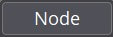
Pressing the "Add Node" Button opens the palettes of the 9 native panels and 11 extension panels! That's two hundred knots at the moment!
|
Left button: Click on the background and move - Selection Tool Shift + Click on the background and move - Selection tool (Add mode) Alt + Click on the background and move - Screen mode Alt+ Clic on "New" - new window(s) of NodeEditor !!! Shift + Click on a Node - select a Node (Add mode) Click on a Node and Move - Move a Node Clicking on an Input Link - disconnect an input Double click on a node - opens the Info window Double click on the background - shows / hides the Debug Info Right button: Clicking and moving - Moving the screen Click - Contextual menu for creation Click and move from Right to Left = Selection Click on the Node "Selected" for Update, Erase... Wheel: Zoom/Un-Zoom Clicking on a Node - selecting / deselecting a Node Click and drag on the background - Move the screen |
Native Panel+ Extention Pannel!
The 2 Genal Pannels
|
Below the Node Circle By Base/ Curves / Circle
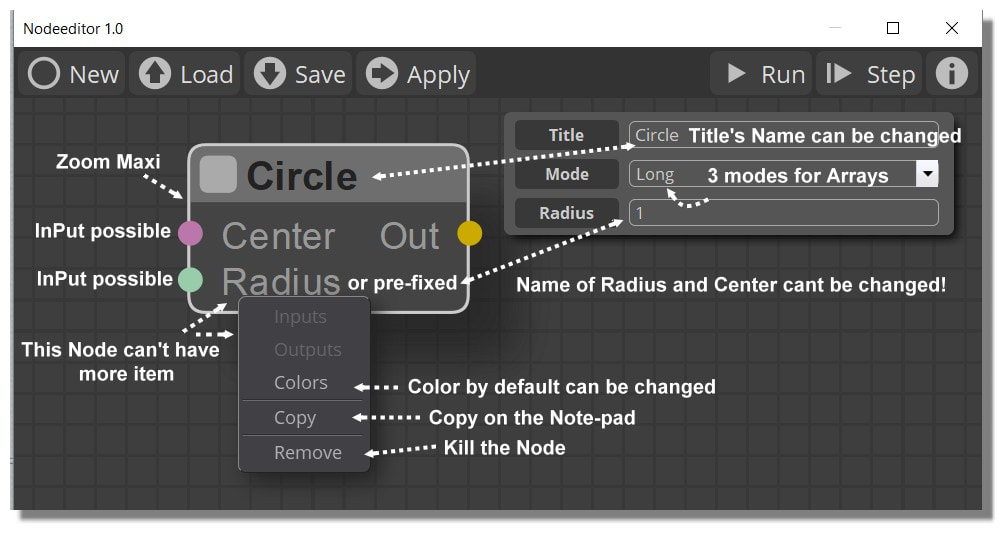
Info of Node Circle asked !
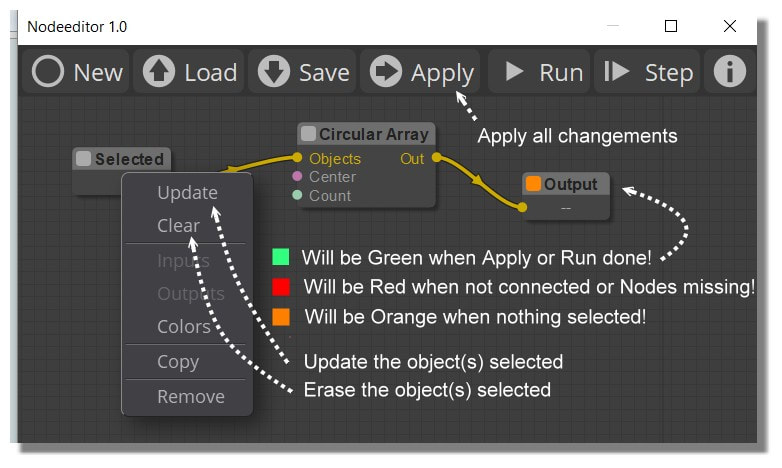
The Menu bar of the Node Editor
New: Start a new node project but do not delete what is on the screen!
Load: Load an existing node project - delete what is on the screen!
Save: Save the node(s) to the screen
Apply: Makes the changes made active
Start / Stop: Starts / Stops the current Node group
Step by step: step by step progress in the progress of the actions of the current project
Info: Information panel(s) of the selected node(s)
|
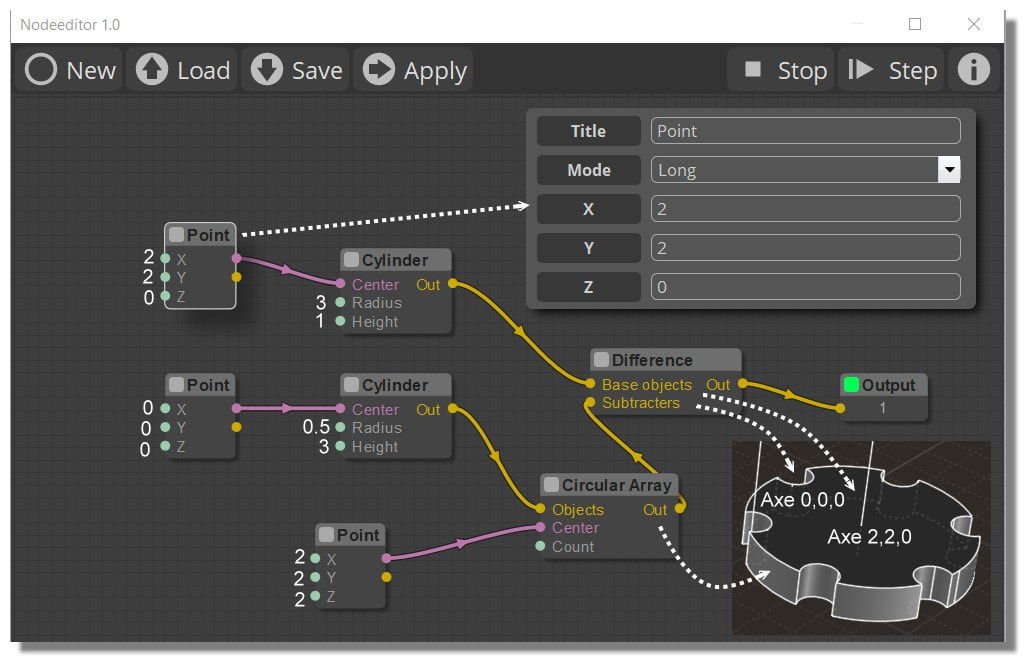
Example of the use of the Arrays with Mode Long & Short
A "Cross" mode is also existing! you can send several values to each node entry.
For example, you can create a circle node and define the radius "10,15,33", and you will get three circles (use of"," as table separator and"..." as decimal separator). Or create a point node and define X "0,2,4", Y "0,3,6", Z "0,5,10". In this case the editor will process all the tables simultaneously. You will get three points (x, y, z): (0,0,0) (2,3,5) (4,6,9) |
For the moment we don't have control over the normal selection of objects after an Elephant session!
It is therefore necessary to add this Script as a shortcut before it will be integrated directly into the output of a node!
script: var objs = me.geometryDatabase.getObjects(); for ( var i = 0; i < objs.length; ++i) { var obj = objs.item(i); obj.setHitTest( true); }
It is therefore necessary to add this Script as a shortcut before it will be integrated directly into the output of a node!
script: var objs = me.geometryDatabase.getObjects(); for ( var i = 0; i < objs.length; ++i) { var obj = objs.item(i); obj.setHitTest( true); }
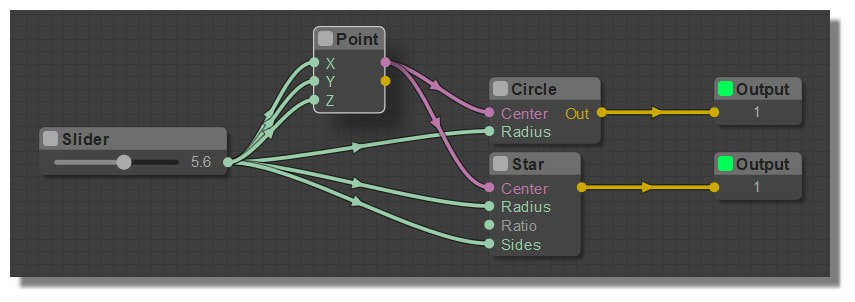
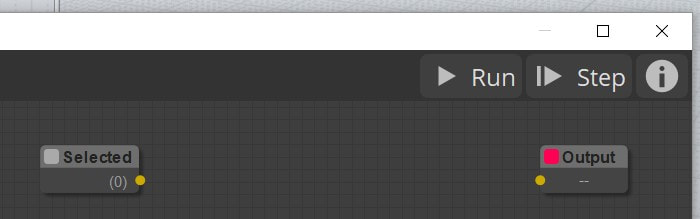
Color of the "squares' Nodes" Orange can be also a bad data lformat inked!
Some colors Nodes can have several "Start" : Light Green and Violet!
Same multiple Targets are not allowed!
Same multiple Targets are not allowed!
Some colors Nodes can have several "Start" : Light Green and Violet!
Add a Node at the start by default of the Nodeeditor
You must edit the file init.js, located in core subdirectory of nodeeditor. (by Bem)
So here add the 3 lines for the Selected node with absolut respect of the syntax!
function loadDefaultNodes()
{
var node_output = LiteGraph.createNode("Basic/Output");
node_output.pos = [800,100];
graph.add(node_output);
var node_selected = LiteGraph.createNode("Objects/Selected");
node_selected.pos = [400,100];
graph.add(node_selected);
}
Little Tips
Use the TAB key for validate numerical imput!
More easy than the Enter Key : automatically goes to the next case!
Use the TAB key for validate numerical imput!
More easy than the Enter Key : automatically goes to the next case!
When you do File / New (Moi3D) the nodes already created with Elephant remain on the screen!
The fictitious "radius" of the Circular Array is made by difference of the position of the selected objects and the position of the requested axis! (here XYZ = 0,0,0 and XY = 2,2,0)
Some tricks
Some tricks
Open directly a page from Moi with a ShortCut like this image of ELEPHANT Native Nodes!
moi.filesystem.shellExecute( 'http://moiscript.weebly.com/uploads/3/9/ 3/8/3938813/native-f_orig.jpg' );
moi.filesystem.shellExecute( 'http://moiscript.weebly.com/uploads/3/9/ 3/8/3938813/native-f_orig.jpg' );
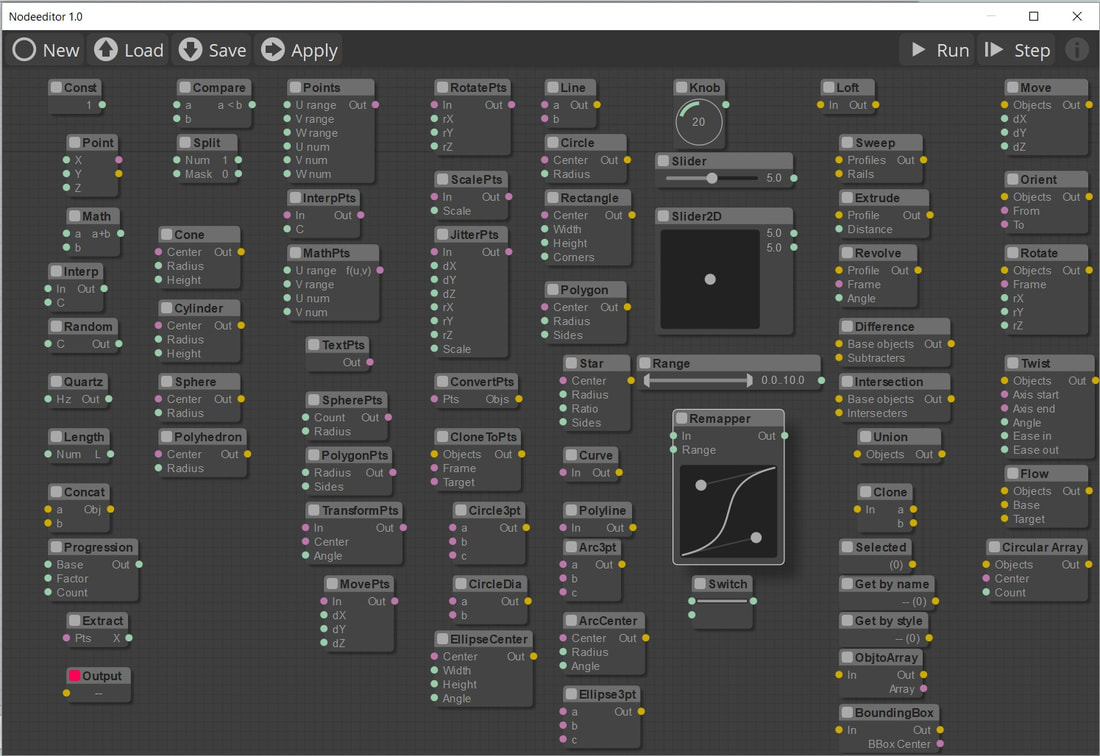
Native Nodes