Extensions: Construct2
Sweep Blend Fillet Offset Mloft2 Planar IsoCrvs Text Numbering RailRevolve Network ProjectMp Shell LineWeb
Classical Sweep by Profile(s) & Rail(s)
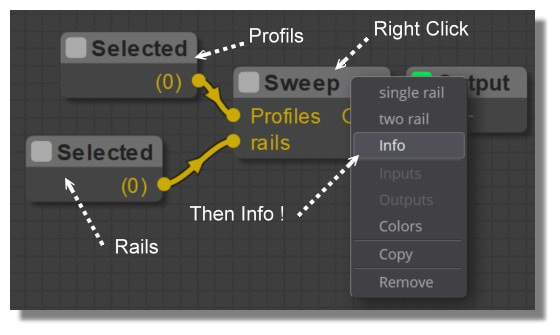
One Rail
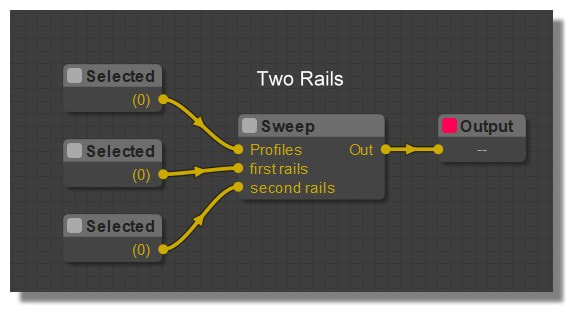
Two Rails
|
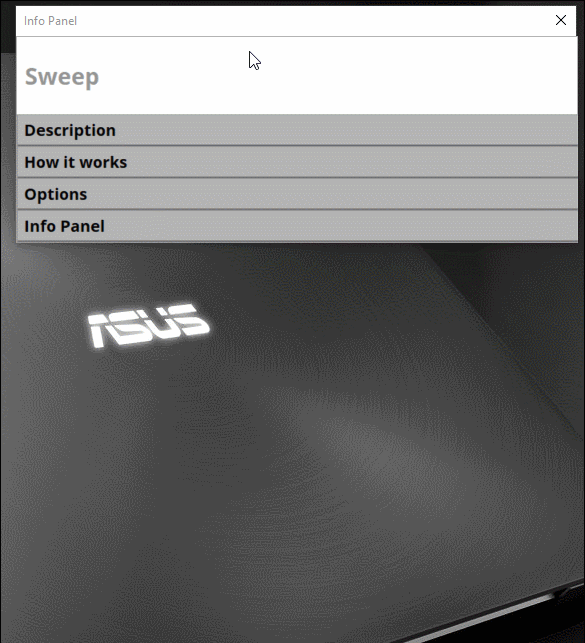
Windows opened by Click on the Info !
|
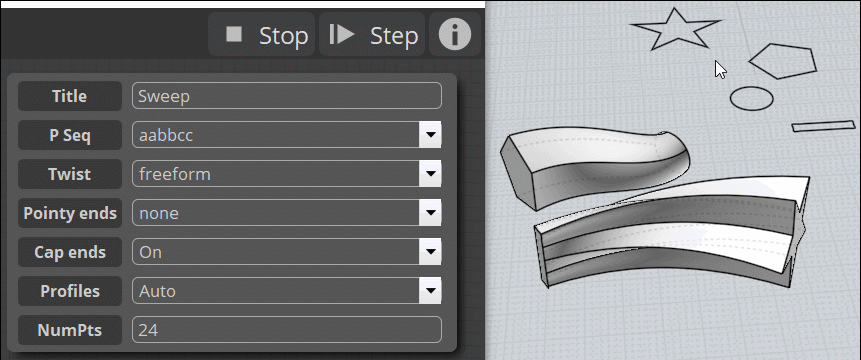
Different options of the Sweep
Sweep Blend Fillet Offset Mloft2 Planar IsoCrvs Text Numbering RailRevolve Network ProjectMp Shell LineWeb
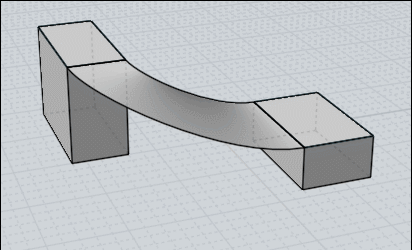
Blend Between 2 Edges
|
Works only on "Surfaces" so if you have 2 cubes A & B and want Blend their tops
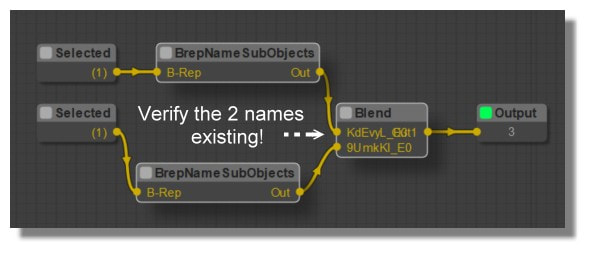
- Select Top cube A / Separate - Call NodeEditor - Drop Objects / Selected Node - Update (cube A) selected face disapears - Select Top cube B / Separate - Drop Objects / Selected Node - UpDate (cube B) selected face disapears - Inverse Selection / Hide ... not obligatory but more practical for future selection of edges! These 6 steps above can be made with some variations of order but... - Run NodeEditor - Drop Objects2 / BrepNameSubObject Node (for cube A) - Link Selected Node (cube A) to BrepNameSubObject Node... face becomes blue - Drop Objects2 / BrepNameSubObject Node (for cube B) - Link Selected Node (cube B) to BrepNameSubObject Node... face becomes blue - Drop Construct2 / Blend Node - Link BrepNameSubObject Node (cube A) to Blend Node - Link BrepNameSubObject Node (cube B) to Blend Node - Select Edge (cube A) becomes yellow - Select Edge (cube B) becomes yellow - Click on Blend Node for verify that is 2 names objects are existing - Drop Basic / Output Node - Link Blend Node to OutPut Node - Unhide and Join depending of what do you want... et voilà : If you miss a step better to remake! :) |
Blend Node
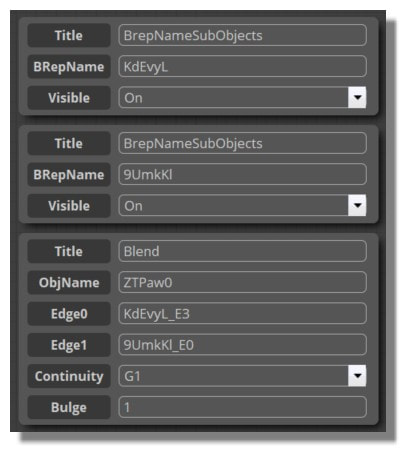
No Need to put Name, it's automatic!
|
Blend names are automatic! But if not existing something is wrong!
Sweep Blend Fillet Offset Mloft2 Planar IsoCrvs Text Numbering RailRevolve Network ProjectMp Shell LineWeb
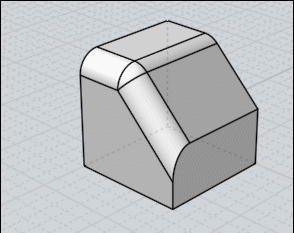
Fillet on Edges
|
- Draw or take an existing volume
- Select It - Call the NodeEditor - Drop Objects / Selected Node so yet enabled because something is yet selected so no need to Update! - Drop a Slider from Widget if necessary and with limits if you don't want see the volume disappear! :) - Run the NodeEditor indispensable!!! - Drop Objects2/ BrepNameSubObjects Node - Link Selected Node with BrepNameSubObjects Node : a blue volume appears - Select Edges wished on this blue volume (who becomes Yellow) to Fillet - Drop Construct2 / Fillet Node - Link BrepNameSubobjects Node to Fillet Node - Drop Basic / Output Node - Link Fillet Node to OutPut Node : a temporary volume appears... kill the blue one - You can link the Slider Node to Fillet Node and search your best form! et voilà .... 14 steps to learn... miss a Step you must remake! :) |
Fillet with a Slider
|
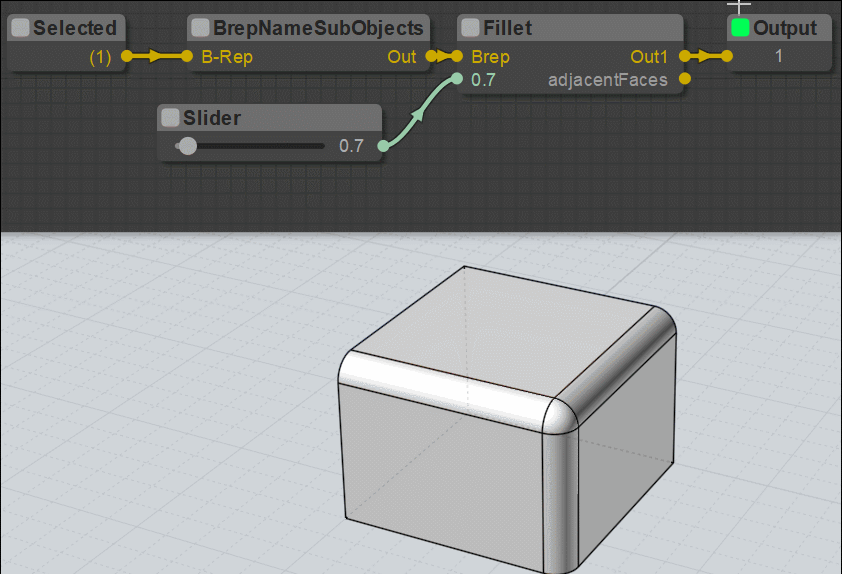
Fillet Node
Sweep Blend Fillet Offset Mloft2 Planar IsoCrvs Text Numbering RailRevolve Network ProjectMp Shell LineWeb
Classical Offset
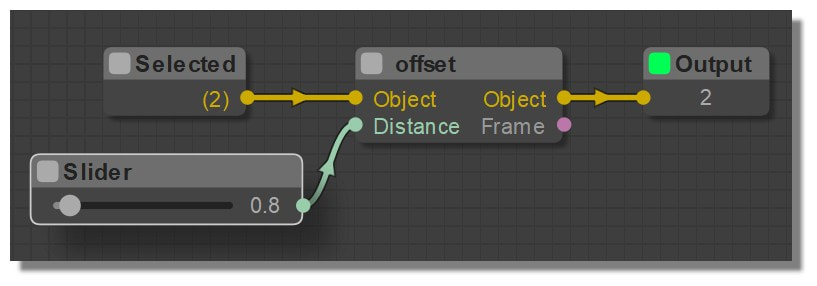
Offset Node ...can be Multiple
Offset Node
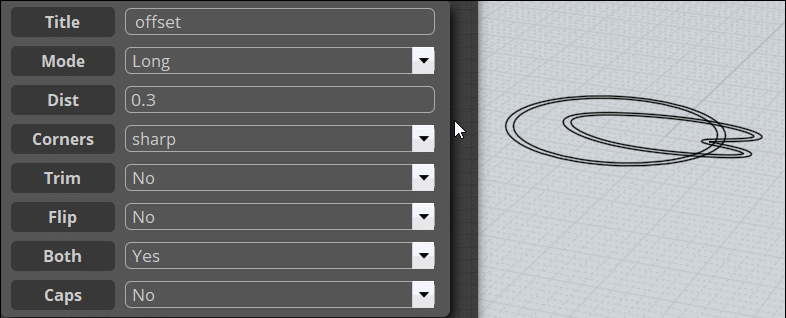
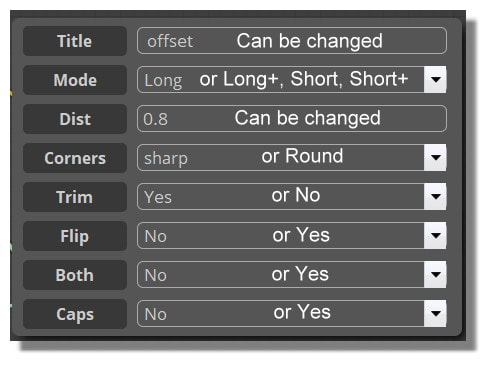
Some options of the Offset Node
Sweep Blend Fillet Offset Mloft2 Planar IsoCrvs Text Numbering RailRevolve Network ProjectMp Shell LineWeb
Loft 2 Families of curves : warning result depends of order of selection inside each family!
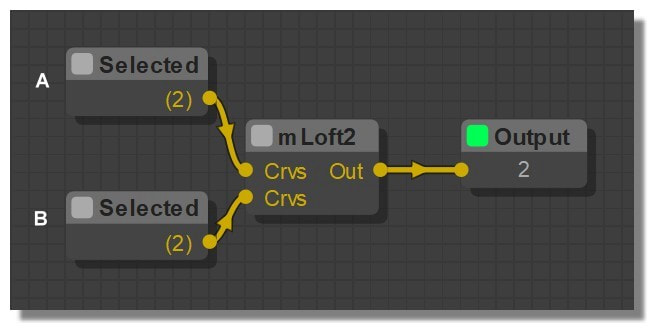
Mloft 2Node : 2 Famillies of Curves

MLoft2 Node
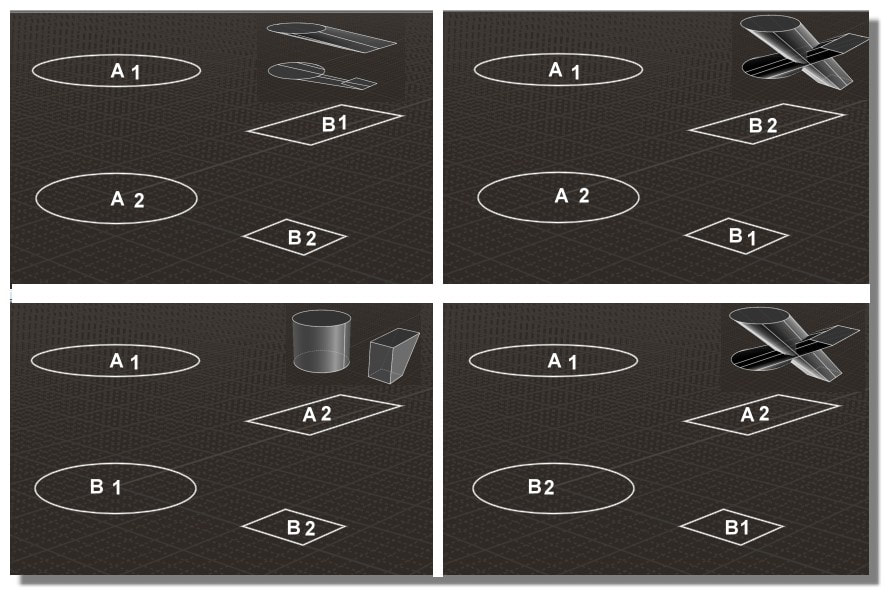
MLoft2 : result depends of order of selection inside families of Curves!
Sweep Blend Fillet Offset Mloft2 Planar IsoCrvs Text Numbering RailRevolve Network ProjectMp Shell LineWeb
Fill a plane curve closed for give a Plane Surface!
Planar Node
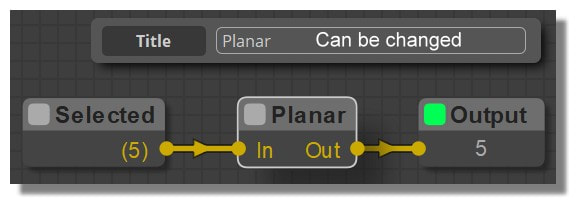
Planar Node
Sweep Blend Fillet Offset Mloft2 Planar IsoCrvs Text Numbering RailRevolve Network ProjectMp Shell LineWeb
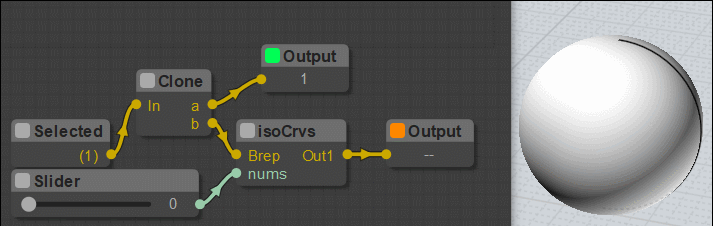
Draw Iso Curves on a Volume or a Surface
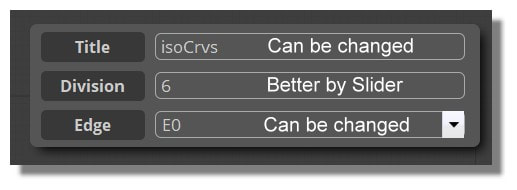
Isocurve Node : E0 ...E3 Orientation
You must Display the volume if you want see it in the same time than the IsoCurves!
Can have a direction!
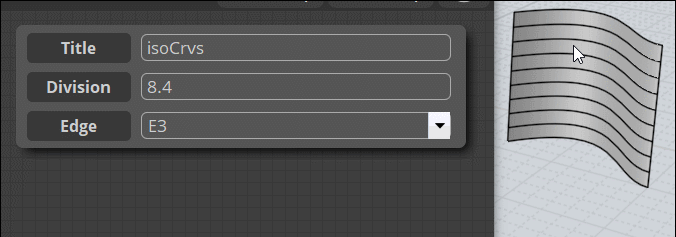
Some direction on a surface
Sweep Blend Fillet Offset Mloft2 Planar IsoCrvs Text Numbering RailRevolve Network ProjectMp Shell LineWeb
Write a Text anywhere on the space !

Text Node
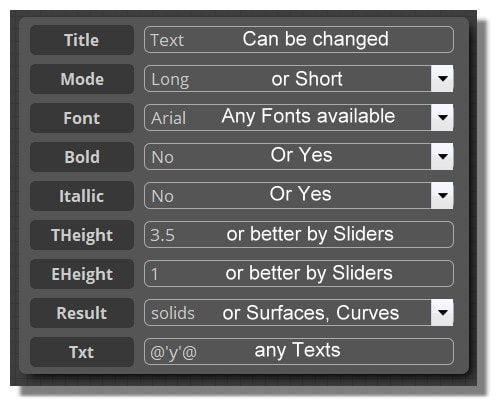
Text Node
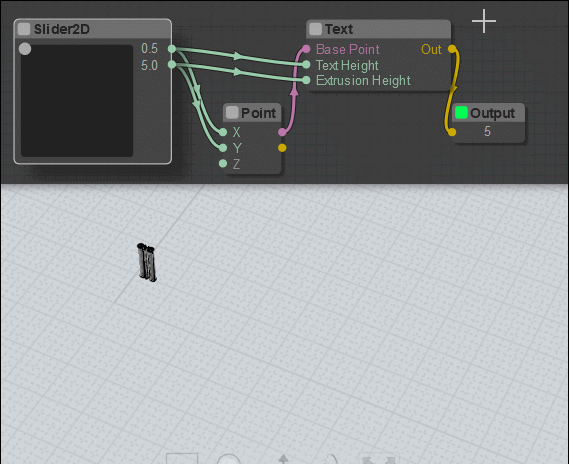
Text Node
Sweep Blend Fillet Offset Mloft2 Planar IsoCrvs Text Numbering RailRevolve Network ProjectMp Shell LineWeb
Write Numbers anyhere on the space!
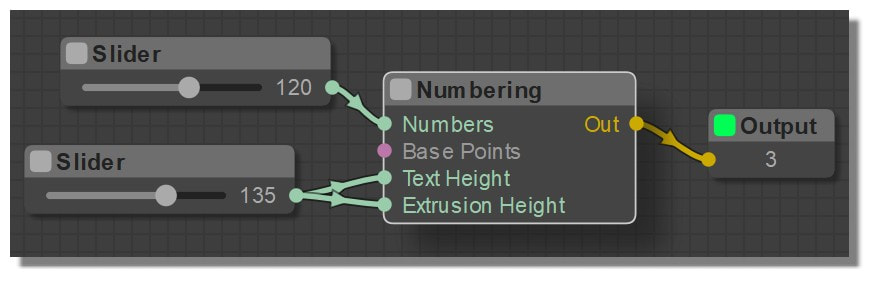
Numbering Node
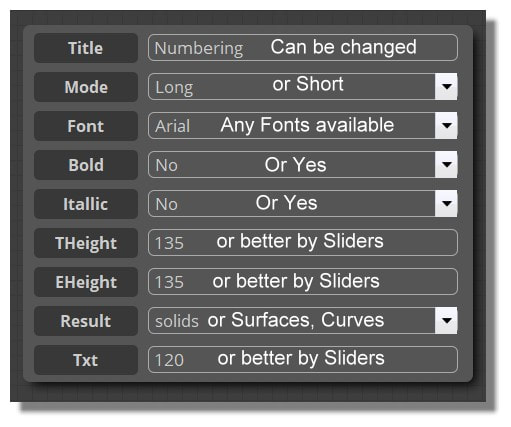
Numbering Node
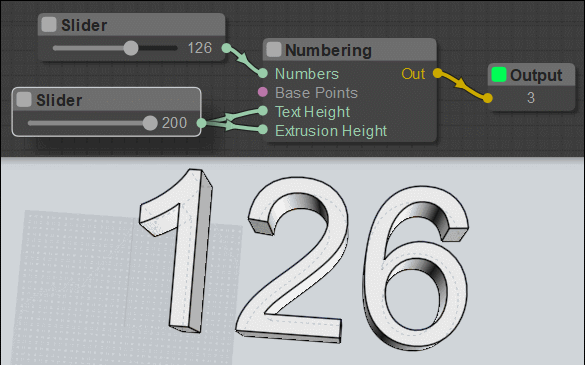
Numbering Node
Sweep Blend Fillet Offset Mloft2 Planar IsoCrvs Text Numbering RailRevolve Network ProjectMp Shell LineWeb
Make a Revolve of a Profil onto a Rail
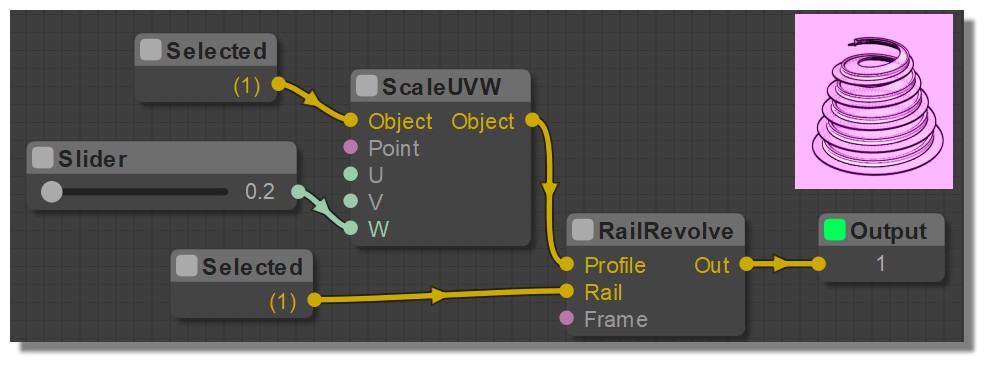
RailRevolve Node
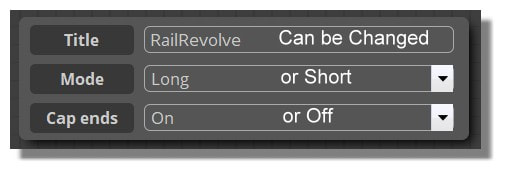
RailRevolve Node

Classical RailRevolve a Point is taken for axe not obligatory except for deviant form!
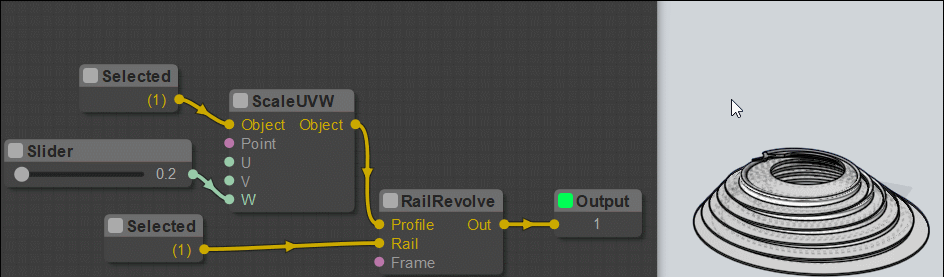
RailRevolve Node
Sweep Blend Fillet Offset Mloft2 Planar IsoCrvs Text Numbering RailRevolve Network ProjectMp Shell LineWeb
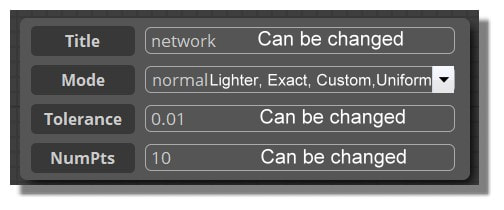
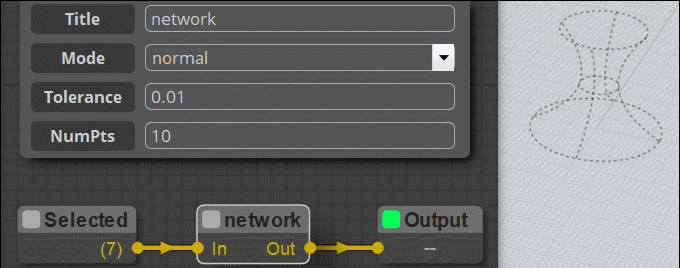
Generate a surface from a wire! Better if there are yet connection between curves!
Sweep Blend Fillet Offset Mloft2 Planar IsoCrvs Text Numbering RailRevolve Network ProjectMp Shell LineWeb
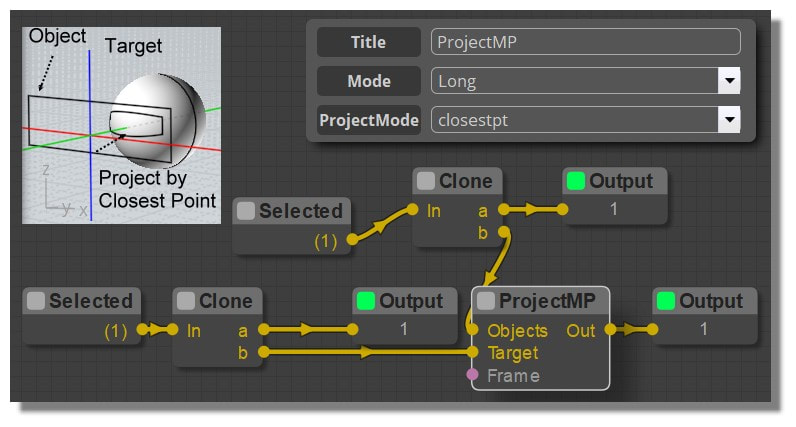
ProjectMPNode by Closest Point
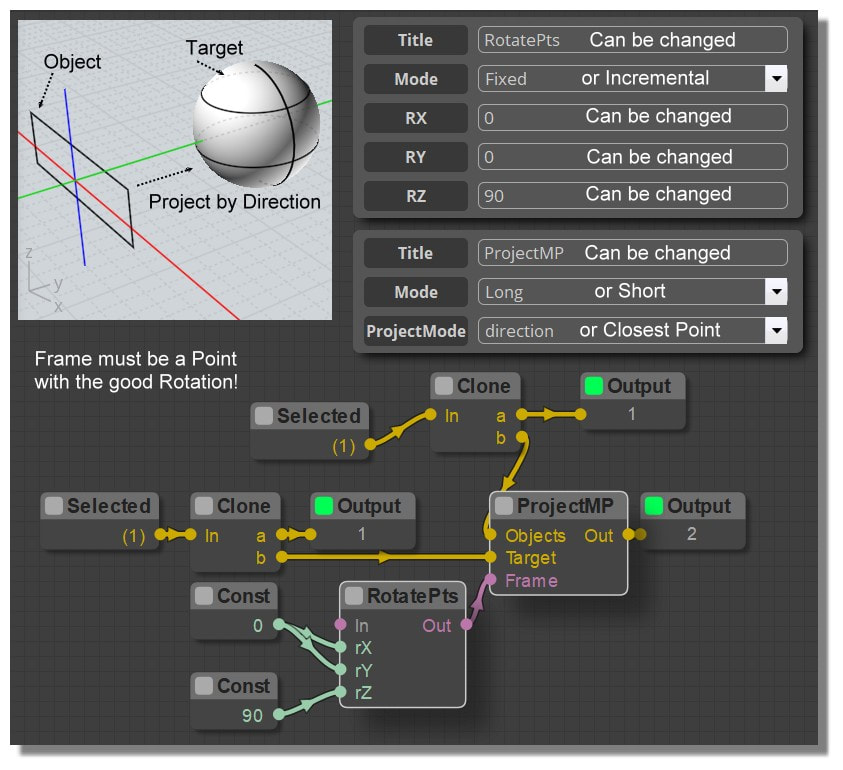
ProjectMP Node by Direction
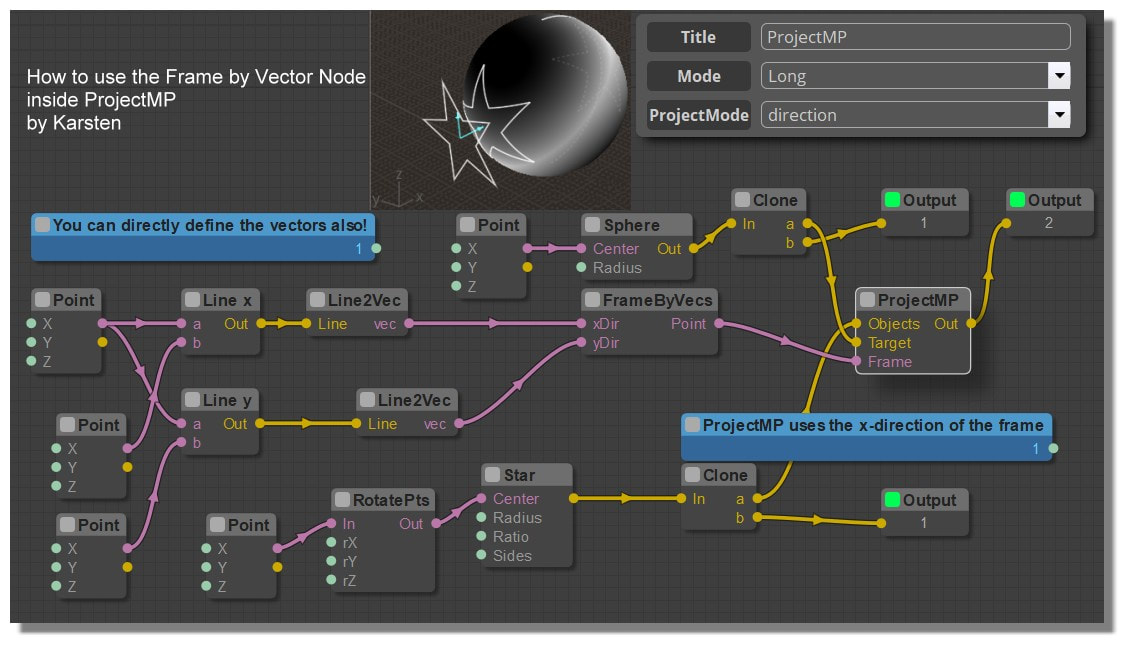
Use of the Frame by Vectors By Karsten
or more simple :)
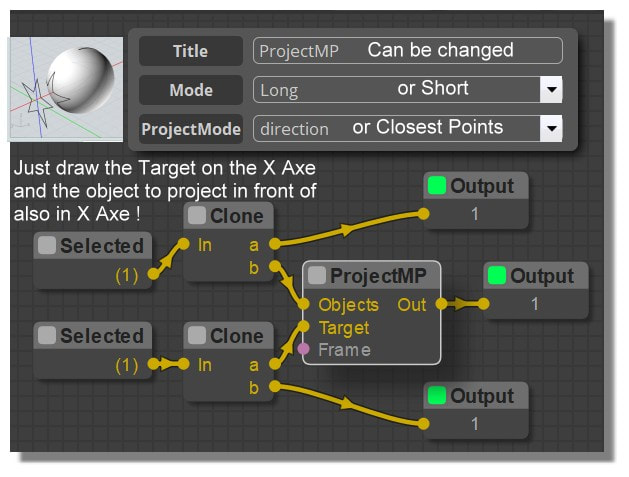
ProjectMP Node more simple!